Understanding Word Processing
Using a computer to create, edit, and print documents. Of all computer
applications, word processing is the most common. To perform word processing,
you need a computer, a special program called a word processor, and a printer. A
word processor enables you to create a document, store it electronically on
a disk, display it on a screen, modify it by entering
commands and characters from the keyboard, and print it on a printer.
Introduction To Microsoft Word
Microsoft Word is (practically speaking) “identical” on both the Macintosh and
Windows computer platforms. Thus we can learn to use the Macintosh version
of Word on an IBM compatible and visa-versa. While we will be using
Microsoft Word as our word processing program, many of the techniques we’ll
cover are applicable on other word processing programs as well.
Most Microsoft programs allow a minimum of 3 different ways to accomplish
any single task. It isn’t necessary for you to learn all three. Simply pick the
method, which best fits your personality type. I personally like the Hot Keys,
which allow me to keep my hands on the keyboard. Please note that Mac and PC
Hot Keys are the same except the PC always uses the Control Key Ctrl along
with another key and the Mac always uses the Command Key(Apple) Key along
with another key. For Example: Undo on the PC is Ctrl+Z: Undo on the Mac
is (Apple)Z
How To Start Microsoft Word

Starting Word
- via Start Menu (PC Only): Click on the START Menu (usually the
lower left-hand side of the screen) and select “Microsoft Word” from
the “Programs” Folder. - via the Microsoft Office Manager: The Microsoft Office Manager,
is an optional toolbar which floats around on the Window’s desktop.
On the Mac, its found as a menu option (near help). - via the Desktop (Word in the MS Office Folder): Open “My
Computer”, open “C:”, open “Programs”, open “Microsoft Office”,
and then double click on “Microsoft Word”.
Basic Components of MS Word Menu Bar
MS Word offers a variety of operation, right from typing data to adding statistics
to taking prints and making it attractive. The menu bar offers the following list
of heads with variety of operations.

File Options
File options in MS word offers opening of new documents, saving documents,
printing, importing and exporting files etc.

Word is a user friendly software, it offers simplicity in operations and if at all
there is any information and problem that the user is facing, word provides the
facility of “Help” option on its menu whereby users can type their problem and
can get an online and offline support.
Opening and Closing of New Documents Opening New Documents In order
to open a new document one has to click on the file button on the top bar of the
MS Word. On opening the same the first option new appears on the screen and
by clicking on it we get a fresh document to work on.

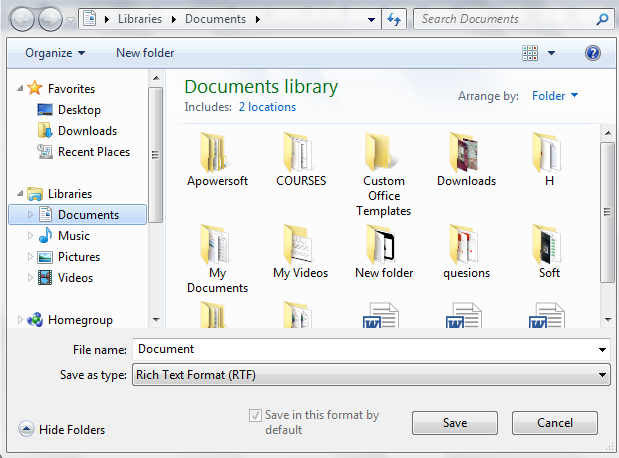
Save and Save As
Post typing the material on the word file, MS Word gives us an option to save
the file for future reference. We have to click on the file menu and select save
option.

file in desired directory and desired file. Post selection of directory and file we
have to click “Save”.
In cases where we would like to make amendments to a file and save it in
another name. In that case in place of save we use the save as option in this case
and its system is same as that of save option.
Page Setup
While getting started with a new word file. We get an option of selecting a
complete page size, its margings, headers, etc. For effective page setup select the
“page layout” option from the top bar and select the desired options

Print Preview
Its always better to see a print preview of the document before actually printing
it as in that case one can save wastage of paper, time and effort. In order to see a
print preview one has to click on the file menu, then select the print option and
further select print preview to generate preview of the document.

Printing Of Documents After being satisfied with the print preview, we can
proceed towards printing of the documents. From the file bar select print option
and further select print option.

Post selecting the print option the computer opens the print setup, whereby we
can decide on the quality, quantity, size of the page etc. On selection of all the
options as desired and then click OK.

Text Creation and Manipulation Document Creation: This is the foremost
function of Microsoft word to create documents, we have seen how to create a
new document earlier in this chapter.
Editing Text : Editing of text is very easy in MS Word. We can just use the
mouse and click on the places we want to inset text or insert spaces or make any
kind of modifications.
Text Selection : It is a feature that makes word easy to use. One can easily with
the use of a mouse select the content that he desires. Press the left button on ur
mouse and keep it pressed for the time and line you intend to select.

Spell-Check and Thesaurus Word provides its users with facilities like spell
check and thesaurus under the “review” heading on the top bar. On giving the
spell check command the word in itself starts checking the wrong spelling in the
selected content on the word file. It gives a complete instruction before
correcting the spellings and asks the user if he wants to replace the spellings or
not.Thesaurus facility helps in finding the right meaning and synonymous for the
selected words from the text file.

Formatting the Text Presentation of text is all about the format and way its
been presented. Word offers quality formatting options like line alignment, bullet
points, case, headers etc.
Alignment of Text
Word gives various facilities for alignment of text material, a user can side align
(left and right), centre align or straight align the content as per his desire. On the
home bar of the word there are aligning options available to the user. We can
select the text content and align it at wish. For aligning the text one has to select
the content and click on the options on the bar menu.

Indenting the Paragraph Indentation determines the distance of the paragraph
from either the left or the right margin. Within the margins, you can increase or
decrease the indentation of a paragraph or group of paragraphs. You can also
create a negative indent (also known as an outdent), which pulls the paragraph
out toward the left margin. You can also create a hanging indent, in which the
first line of the paragraph is not indented, but subsequent lines are.
Indent only the first line of a paragraph
1. Click in front of the line that you want to indent.
2. On the Page Layout tab, click the Paragraph Dialog Box
Launcher, and then click the Indents and Spacing tab.

the By box, set the amount of space that you want the first line to
be indented.
The first line of the paragraph and all subsequent paragraphs that you
type will be indented. However, any paragraphs before the selected
paragraph must be manually indented by using the same procedure.
Increase or decrease the left indent of an entire paragraph
1. Select the paragraph that you want to change.
2. On the Page Layout tab, in the Paragraph group, click the
arrows next to Indent Left to increase or decrease the left
indentation of the paragraph.
Increase or decrease the right indent of an entire paragraph
1. Select the paragraph that you want to change.
2. On the Page Layout tab, in the Paragraph group, click the
arrows next to Indent Right to increase or decrease the right
indentation of the paragraph.
Set an indent by using the TAB key
1. Click the Microsoft Office Button , and then click Word
Options.
2. Click Proofing.
3. Under Auto Correction settings, click Auto Correct Options,
and then click the Auto Format As You Type tab.
4. Select the Set left-and first-indent with tabs and backspaces
check box.
5. To indent the first line of a paragraph, click in front of the line.
To indent an entire paragraph, click in front of any line but the first
line.
Bullets & Numbering While presenting a report or an analysis its always better
to present the highlighted or important points in the form of numbered lines or
bullet points. In word we have the edge of using bullets, pointers, numbers etc.
For our line we have to select the choice of bullet or numbering pointers from
bar menu and just enter the data.

Changing Case
Text can be typed in lowercase or small letters, uppercase or capital letters, or a
mix of the two cases. Have you found yourself wishing you could change the
capitalization of a section of text without having to retype the whole thing? You
can, when you use the Format | Change Case Command.Proper nouns should be
capitalized. The first word of sentences should be capitalized. Titles should be
capitalized. What if you forget? What if you capitalize where you normally
would not? You can change the case of all the text at once with a single
v command -- a great time saver!
To do so:
1. Highlight the text you want to change.
2. Choose Format | Change Case. This opens the dialog box that
gives you the choice between Sentence case, lower case, UPPER CASE,
Title Case, and toggle case. Next, choose the type of formatting you
want to use from the below choices and click OK.
Sentence case: capitalizes the first letter of the first word and
puts the rest in lowercase.
Lower case: changes everything to lowercase, with nothing
capitalized.
Title case: capitalizes the first letter of every word. Toggle case
changes capital letters to lowercase and vice versa. (You don't use this
choice much anymore because if you make a mistake such at typing
TOGGLE, using the Shift key while Caps lock is on, Word automatically
corrects it and turns off the Caps lock.) Alternatively, press the Shift+F3
shortcut key repeatedly to cycle through three formats: UPPER CASE,
lowercase and Title Case. Capitalization is under your control, even for
large amounts of text. When you use Title Case, you'll most likely have to
go back and make a few corrections. In titles, small words (such as:
articles, coordinate conjunctions, and prepositions, such as "the," "and,"
"in," "on," "for," etc.) should not be capitalized unless they are the first
word in the title.
Table Manipulation
Method 1: Create a Table by Using the Standard Toolbar
1. Click where you want to create a table.
2. On the Standard toolbar, click Insert Table.
3. Drag to select the number of rows and columns that you want.
4. When you finish creating the table, click into a table cell, and then
either start typing or insert a graphic.
Method 2: Create a Table by Using the Table Menu
1. Click where you want to create a table.
2. On the Table menu, point to Insert, and then click Table.
3. In the Insert Table dialog box, change Number of
columns and Number of rows to the size that you want for your
table, and then click OK.
For example, change Number of columns to 5, and change Number of
rows to 2.
4. When you finish creating the table, click into a table cell, and then
either start typing or insert a graphic.
Method 3: Draw a Table by Using the Tables and Borders Toolbar
1. On the View menu, point to Toolbars, and then click to select Tables
and Borders to display the Tables and Borderstoolbar.
2. On the Tables and Borders toolbar, click Draw Table (the pencil
icon). The mouse pointer changes to a pencil.
3. To draw your table, position the pencil in the document where you
want the insert the table, and then click and drag to draw a line from
one corner of the table to the corner that is diagonally opposite. This
action defines the boundary of the entire table.
4. To add columns and rows, click where you want to insert the column
or row, and then drag to draw your new column or row.
5. To turn off the table drawing tool, click Draw Table (the pencil icon)
on the Tables and Borders toolbar.
6. When you finish creating the table, click into a table cell, and then
either start typing or insert a graphic.
How to Create a Table Inside Another Table (Nested Tables)
1. On the Tables and Borders toolbar, click Draw Table.
2. Position the pencil in the cell where you want the nested table (a table
inside another table).
3. Draw the new table. To define the table boundaries, draw a rectangle.
Then draw the column and row lines inside the rectangle.
How to Change the Width and Height of Table Columns and Rows
Change the Column Width in a Table
Rest the pointer on the column boundary that you want to move until the pointer
becomes a horizontal two-pointed arrow, and then drag the boundary until the
column is the width that you want.
NOTES:
- To change a column width to a specific measurement, click a cell in
the column. On the Table menu, click Table Properties, and then
click the Column tab. Choose the options that you want. - To make the columns in a table automatically fit the contents, click to
select the table, point to AutoFit on the Tablemenu, and then
click AutoFit to Contents. - To display column width measurements, click a cell and then hold
down ALT as you drag the markers on the ruler.
Change the Row Height in a Table
Rest the pointer on the row boundary that you want to move, until the pointer
becomes a vertical two-pointed arrow, and then drag the boundary.
NOTES:
- To change a row height to a specific measurement, click a cell in the
row. On the Table menu, click Table Properties, and then click
the Row tab. Select the options that you want. - To display row height measurements, click a cell, and hold down
ALT as you drag the markers on the vertical ruler.
Make Multiple Rows or Columns the Same Size
1. Select the columns or rows that you want to make the same size.
2. On the Tables and Borders toolbar, click Distribute Columns
Evenly or Distribute Rows Evenly.
How to Add Columns and Rows to an Existing Table
Do one or more of the following:
To add a new row above or below an existing table row, click into the
table row. On the Table menu, point to Select, and then click Row.
On the Table menu, point to Insert, and then click Rows
Above or Rows Below.
Change the Row Height in a Table
Rest the pointer on the row boundary that you want to move, until the pointer
becomes a vertical two-pointed arrow, and then drag the boundary.
NOTES:
- To change a row height to a specific measurement, click a cell in the
row. On the Table menu, click Table Properties, and then click
the Row tab. Select the options that you want. - To display row height measurements, click a cell, and hold down
ALT as you drag the markers on the vertical ruler.
Make Multiple Rows or Columns the Same Size
1. Select the columns or rows that you want to make the same size.
2. On the Tables and Borders toolbar, click Distribute Columns
Evenly or Distribute Rows Evenly.
How to Add Columns and Rows to an Existing Table
Do one or more of the following:
- To add a new row above or below an existing table row, click into thetable row. On the Table menu, point to Select, and then click Row.On the Table menu, point to Insert, and then click RowsAbove or Rows Below.
- To add a row at the end of a table, click into the last cell of the last
row of your table, and then press the TAB key to create a new table
row.
-or- - To add a new column to the left or right of an existing column, click
into a table cell of the column. On the Table menu, point to Select,
and then click Column. On the Table menu, point to Insert, and then
click Columns to the Left or Columns to the Right.
-or-
- To add a column to the right of the last column in a table, click just
outside the rightmost column. On the Table menu, point to Insert,
and then click Columns to the Right.
How to Add and Remove Borders and Shading from Tables
NOTE: When you insert a table, it has a black, one-half point, solid, single-line
border by default. The following methods discuss how to add a different border
or delete the existing border.
Method 1: Use the Eraser Tool
1. Click Eraser (eraser icon) on the Tables and Borders toolbar.
2. Click to select one of the borders of the table.
3. After you click and release the mouse, the table border will be
erased.
4. Continue this procedure until each border of the table is erased.
NOTE: The Eraser tool can only be used to remove borders or merge cells, not
to apply borders. For additional information about what to do if text is removed
from a table when you use the Eraser, click the article number below to view the
article in the Microsoft Knowledge Base:
Method 2: Automatically Format Table Borders and Shading by Using
Table AutoFormat
1. Click the table.
2. On the Table menu, click Table AutoFormat.
3. In the Formats box, click to select the format that you want.
4. Click to select the options that you want.
NOTE: AutoFormat Table is also located in the Insert Table dialog box (on
the Table menu, point to Insert and then clickTable).
Method 3: Create Table Borders and Shading by Using the "Borders and
Shading" Dialog Box
1. Do one of the following:
- To add a border to a table, click anywhere in the table.
-or-
- To add a border to a specific cell, select the cell that you
want, including the end-of-cell marker. - On the Format menu, click Borders and Shading, and then click to
select the Borders tab. - Use the Setting, Style, Color, and Width options to add a different
border. Make sure the appropriate option (Tableor Cell) is selected in
the Apply to box. - To specify that borders are applied only to specific sides,
click Custom under Setting. Under Preview, click the diagram's
sides, or use the buttons to apply and remove borders. - To specify the exact position of the border relative to the text,
click Paragraph under Apply to, click Options, and then select the
options that you want.
Method 4: Create Table Borders and Shading by Using the "Tables and
Borders" Toolbar
1. Display the Tables and Borders toolbar by pointing to Toolbars on
the View menu, and then clicking Tables and Borders.
2. Click anywhere in the table.
3. On the Tables and Borders toolbar, use the options that you want:
Click the Borders button to select the border that you want.
By default, the Borders button displays the Outside
Borders ScreenTip, but it may display the most recently used
border instead.
NOTE: Borders is also located on the Formatting toolbar.
Change the Line Style box to the line style that you want.
Change the Line Weight box to the line weight that you want.
Change the Border Color box to the color that you want.
Change the Shading Color box to the color that you want to
apply to the cells or to the entire table.
How to Change the Position or Direction of Text in a Table
Change the Text Orientation of a Table Cell
1. Click the table cell that contains the text that you want to
change.
2. Do one of the following:
On the Format menu, click Text Direction.
-or-
On the Tables and Borders toolbar, click Change Text
Direction.
Click the orientation that you want.
Change the Text Alignment of a Table Cell
1. Click the table cell that contains text that you want to align.
2. On the Tables and Borders toolbar, select the option for the
horizontal and vertical alignment that you want (for example, Align
Bottom Center or Align Top Right).
How to Position a Table on the Page
Change the Alignment of a Table by Using Table Properties
1. Click to select the table.
2. On the Table menu, click Table Properties.
3. On the Table tab, under Alignment, select the option that you want.
For example, to indent a left-aligned table, type a number in
the Indent from left box.
TIP: To quickly align a table on a page, select the table, and then use
the alignment buttons on the Formatting toolbar.
Move a Table by Using the Table Move Handle
1. Rest the pointer on the table until the table move handle appears on
the upper-left corner of the table.
2. Rest the pointer on the table move handle until a four-headed arrow
appears.
3. Drag the table to the new location.
Model Questions and Answers.---->>>>>
إرسال تعليق